What are Digital Borders?
A Digital Border is an add-on option for your glass print—giving it the look of a picture mat without adding any extra materials. The border will be printed with ink directly on the glass, ranging from ½" thick on our smallest size to 2 ¾" on our largest size, and symmetrical on all four sides.
They can be applied with or without our Frames, depending on the look you have in mind. Digital Borders are available in 3 solid colors (white, cream, or black) to help add that elevated, gallery-style feel to your prints without changing the sleek finish you love!
Option 1: Add a Digital Border to Your Frameless Print
If you love the clean, modern style of our frameless prints, a Digital Border is an easy way to give your photo a little extra polish.
The border creates a subtle “matted” effect around your image, giving it room to breathe without adding any extra bulk or hardware. Your print still hangs flush against the wall with our signature lightweight mount, so it keeps the sleek, contemporary vibe. This is a great choice if you want a more gallery-inspired look or just want a cohesive feel across multiple prints.
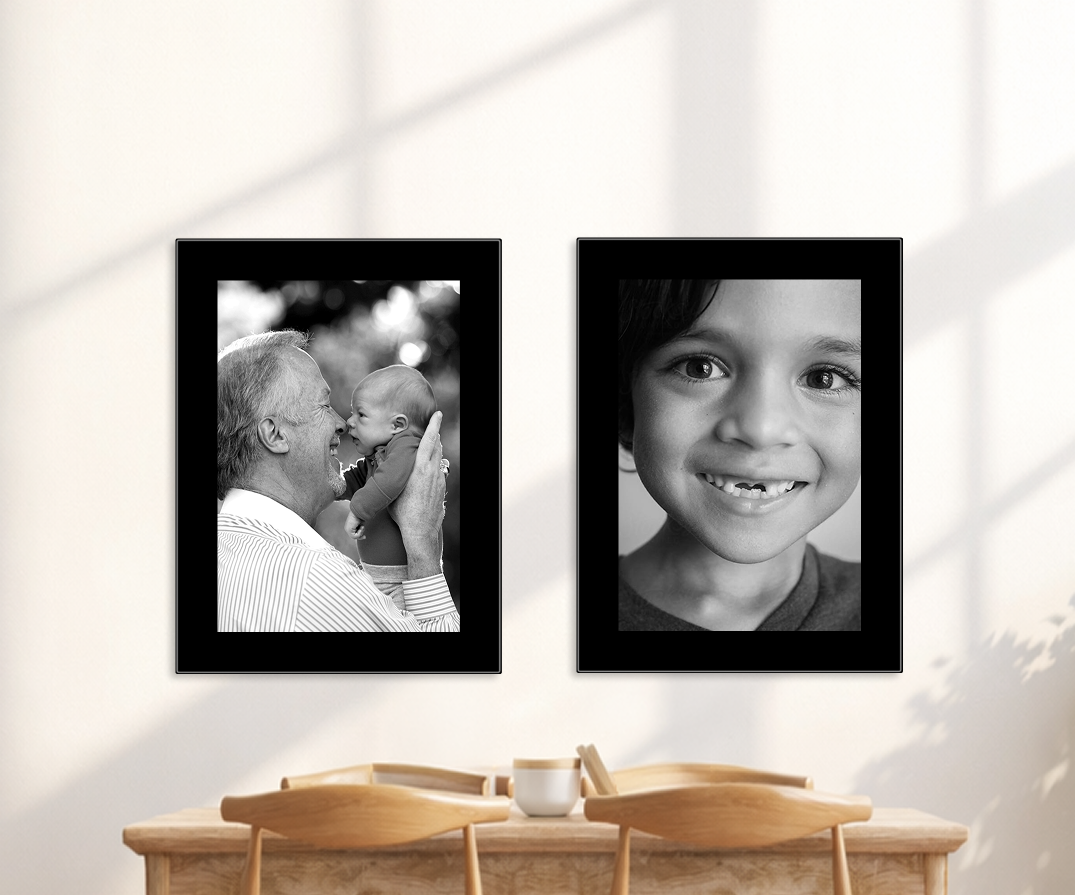
Option 2: Add a Frame for a Classic Mat + Frame Look
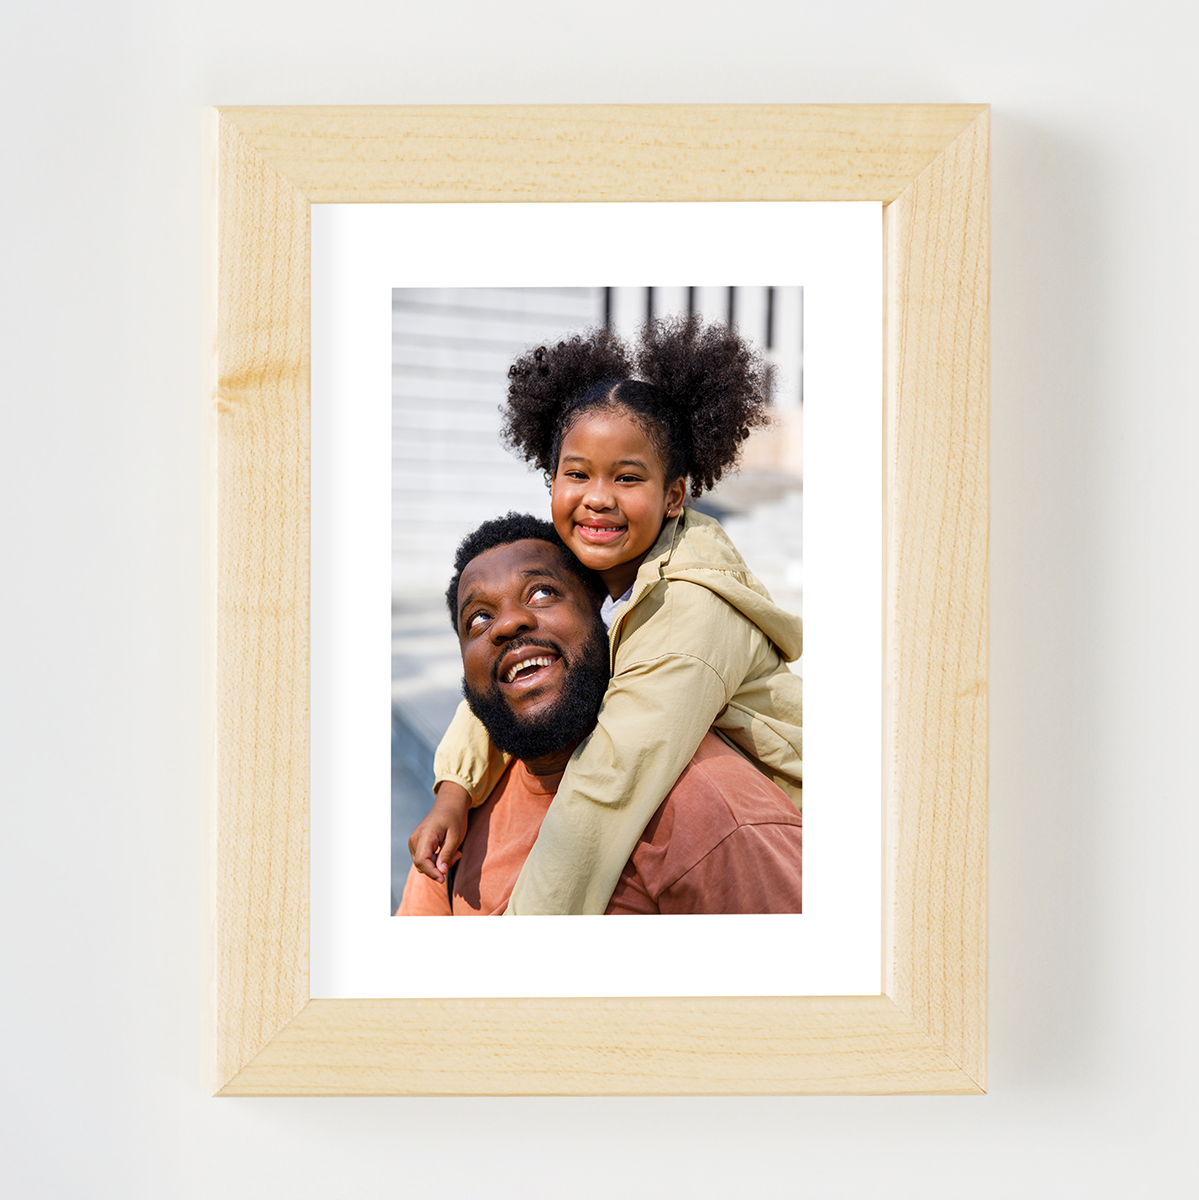
If you prefer a more traditional framing situation, you can pair a Digital Border with our wood Frames. The border acts like a built-in mat, while the frame surrounds the whole piece, giving you that timeless “photo + mat + frame” aesthetic.
This approach works especially well for family portraits, formal photography, or gallery walls that mix modern and traditional elements. You get the classic feel of a framed, matted print, but with all the benefits of glass.
How to add a Digital Border to your print?
-
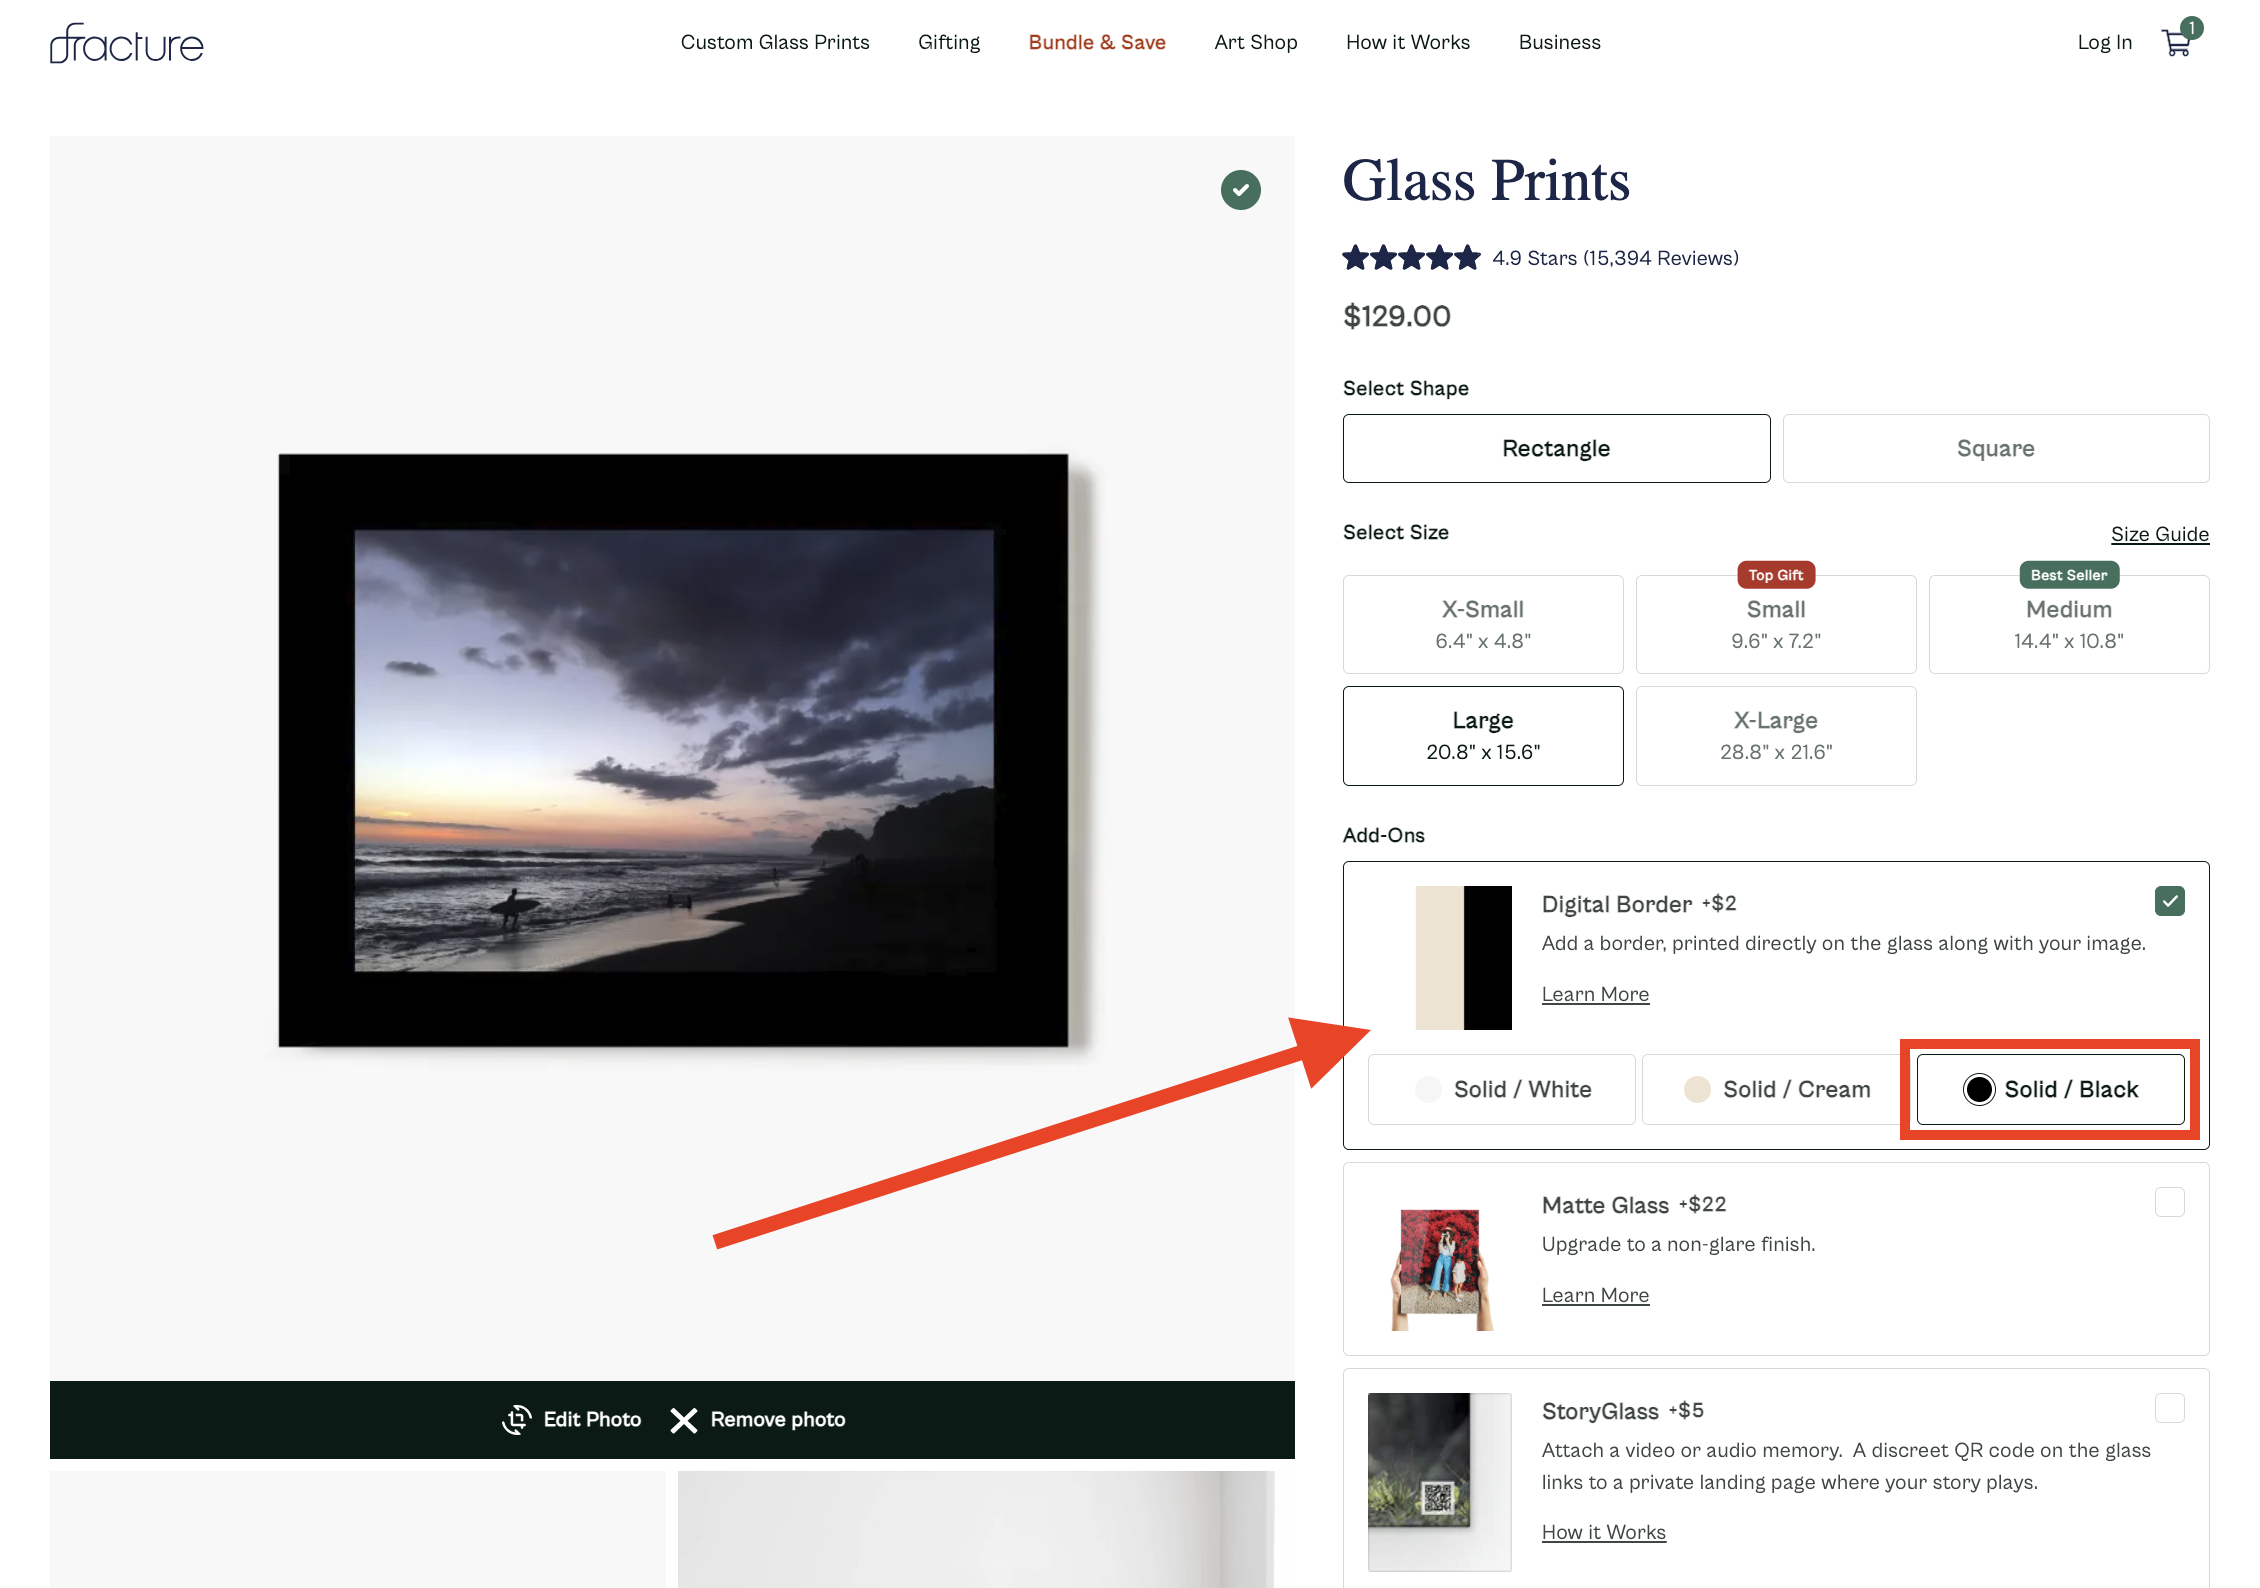
Upload your photo on the Glass Prints page of our site, and select a print size/shape.
-
Locate the 'Digital Border' option from the list of add-on items, and click on the color you wish to purchase. You'll see the border added to the preview of your print:

If you're using a mobile phone to place an order, you'll need to scroll down to find those same add-on options under the preview of your print.
-
Since the border takes up space on the glass, the visible photo area is reduced slightly. Click on the 'Edit Photo' button to adjust the cropped area. You can check out this helpful guide with more info about using our Editor to crop. The preview you see is how it will print onto the glass.
-
If you also wish to purchase a Frame, locate and select that option as well. The preview for your print will adjust each time you select a different color, so you can try different combinations to see what works best for your photo:

- Once you've finalized the options and cropping for your print, click the 'Add to Cart' button to save.

Whether you want modern and minimal, or classic and framed, Digital Borders give you the flexibility to style your photo exactly how you imagine it.